It's common on the 1998 to 2002 line of Chevrolet Prizms for there to be an oil leak on the passenger backside of the engine. It's not leaking there. There's a seal there, that I believe comes with a timing chain set. I've had the timing chain tensioner and seal for a year or so, just not getting around to this minor leak.
If you've seen any of my blogs like www.autobravado.com or carmilespergallon.blogspot.com you'll see articles relating to much more important repair in the last five years. It's leaking squarely on the passenger side of the engine, not front or back, very close to the serpentine belt tensioner. At this height there's just nothing else it can be. It's the head gasket.
Now if you check out my milky oil cap article and a video attached from a fellow mechanic you'll know exactly what I'm not seeing. I see no evidence of any oil or coolant being mixed in the oil, the coolant, or out the exhaust.
I have had a slow decline in my car's mpg from the low 30's in the city to 27. (27 is a new low, hadn't seen worse than 28 in a LONG time.)
Compression is still good and within normal limits. I just bought my own compression tester and leak down tester so that I can redo this specifically being sure that there's nothing deeply wrong other than a small oil leak. This oil leak doesn't even have the decency to get on the ground unless I'm in a Southern Utah summer where the engine is warmed up when I turn it on when it hadn't been on that day yet. So for all but summer, I about forgot about it every year until I had a problem with my transmission that was beyond my abilities.
The owner commented, "It's a mess under there." Wounded, I cleaned up all the grease all over from something I repaired which REALLY leaked badly and I had never cleaned it up. After spending a few hours making things prettier that most people will never see, the next day I look and now I'm aware of this oil leak...
....I've spent days online buying and buying for what I'll do while the cylinder head is off! All I'm saying for now!
If you like, the best hint I'll give is series of pictures of things I'm buying:
June 2015 update for HP when my engine bay is heat soaked:
50 MPH HP run with the fully family. See how the PCM allows higher RPMS only when there is greater load? It'll shift much earlier with less weight in the car:
This upgrade idea seemed tempting, but it's missing the flex the exhaust needs to help protect the engine. The engine is supposed to move some to protect the transmission. The only way to add a flex pipe, would be to add it after the catalytic converter, and that's too little too late.
Okay, the following pictures reveal what all the tool upgrades above are for. A port and polish:
Above points out some land marks on this cylinder head. Of course the intake and exhaust will get get smoothed from their original casting. They'll also get opened up some, how much depends on an ultrasonic metal thickness tester, which I also need to purchase, to know where the intake and exhaust runner are thin and can't be opened up.
The machinist ridge makes some of the most important differences in flow. Without removing it and blending it, the intake and exhaust valves have to open a great deal more for flow to really start. As the fuel mist from the fuel injectors hit the machinist ridge, the mist/fuel droplets tumble and hit each other causing them to get bigger and get a less complete burn.
9/22
A book recommended to me by Hugh O'Brien per our discussion on the Jafromobile channel:
Hugh explained this book will help me with the unique problems
with porting and polishing 4 valve heads.
The information Hugh gave me has been incredible. For example, NA heads don't need the bowl side of the valve opened as much has force inducted engines - 3/16". The burrs I was choosing above were terrible choices. I need single cut burrs, preferably with 6 inch shanks so I can see what I'm doing. The trouble I'm having is I can't find any diagrams of where the coolant jackets are so I know what I can remove and work with. Also, the clyinder style burrs are terrible as they will leave scratches. I'll need to work with single cut carbide burrs only, oval and elongated only.
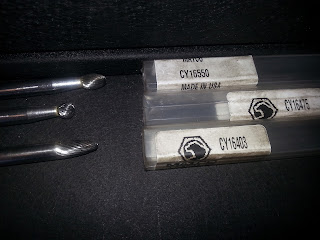
Recent update included pictures of good single cut carbide bits instead of double cut which are too hard to clean. I took down the cheap eBay carbide bits pictures. Here's some part numbers if you want them all, but if you only want one, I think I mixed up the packaging. Couldn't tell you which is which, lol.
Feb 22, 2016 Update:
This is not where I thought this would end...(for now, I'm taking the engine a part and the series has more to go with a part 6 coming out soone!).
by AutoBravado
For the latest on this project, check out my next article, and remember that there's another half article after that!


ReplyDeleteMany Autos repair and replace ABS sensors, abs ring, abs pump for all makes and models in Reading, United Kingdom.We also provide free collection and Delivery service from your home or place of work.